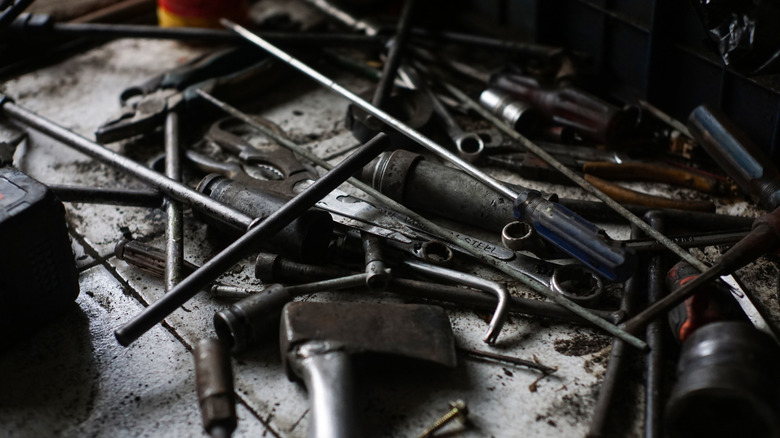
9 Old School Automotive Tools That Even Experienced Car People Might Not Recognize
Younger folks have their fair share of benefits for having been born later in our human existence. We have the internet, work-from-home jobs, and convenient meal delivery services. And yes, people of older generations might have been luckier in other areas, but when it comes to the automotive conversation, there is one thing for certain you can't take away from them — working on their cars was undoubtedly different back then. Why? because of the tools they had.
In an older car, more miscellaneous components had to be checked by hand when compared to today's cars — aka, a bunch of old car problems we're glad don't exist today. This led to the wide use of specific, yet fairly rudimentary tools we would almost never use now. And the more advanced machines they did have all those decades ago generally provided lower quality information (and less of it) than even the hand-held digital tools you can rent or purchase in 2026 for less money.
But, arguably, the most consequential determinant of the continuous change in tools is the cars themselves. As the automotive industry advances in design and development, so do the tools used to maintain them, leaving part-specific tools and many others sitting on the dusty shelf labeled "outdated." The items you'll see in this piece represent this exact phenomenon. However, we want to get one thing straight beforehand — we are not saying that no one uses these tools, but rather that your average modern automotive repair business or private individual shop/garage may not have these. And if they do, most of these tools likely won't be used frequently, either because their design has been improved or their original applications have been phased out of use in modern cars.
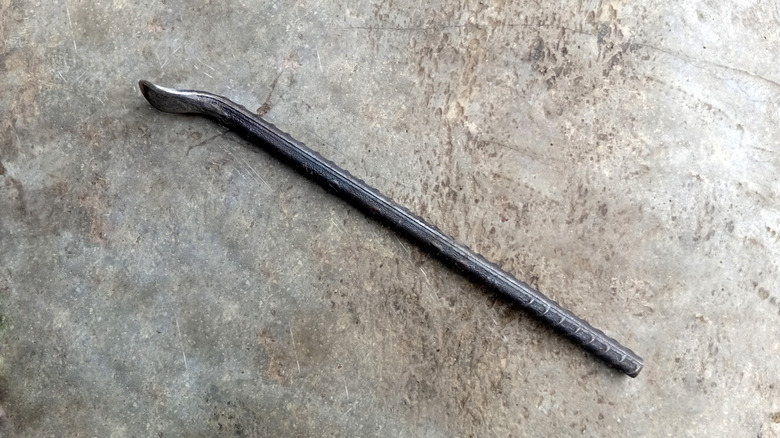
Drum brake spoon
The phrase "drum brake" should have already made it clear that this tool is outdated. In a drum brake assembly, there is usually an adjuster located inside the housing that can change the idle position of the brake shoes (the pieces that are forced outward toward the sides of the drum in order to create friction and slow down the vehicle). Some drum brakes had an automatic adjustment for brake wear over time, but as brakes get older, friction causes the material to degrade and become slightly smaller, which can drastically change brake pedal effort and performance.
One may want to adjust the shoes for multiple reasons, whether that be dialing in a new set of shoes or compensating for wear on existing ones. In any case, this typically entailed adjusting the stationary position of these shoes to be closer to the inside face of the drum to improve brake feel. To properly adjust these components back in the day, you'd need a drum brake spoon, which latches onto the star wheel on the adjuster and moves the idle position of the shoes depending on which direction you turn the star wheel.
Obviously, most modern cars stopped using drum brakes decades ago. The enclosed, heat-trapping design was a big contributor to how brake fade happens, while its counterpart, the disc brake, has several benefits over the old drum, including better heat dissipation, wider performance applications, and improved adaptability to different weather conditions. As a result, the brake spoon largely lost its mainstream purpose in life. However, some modern cars still utilize the old ways. Even the Audi Q4 E-Tron uses drum brakes (at the rear), as they are cheaper to manufacture and can work well with EV applications.
Leaf spring spreader
In most 1960s-era passenger car applications, for example, you'd only find leaf springs on the rear axle, though many heavy-duty trucks and off-road vehicles also used them on the front. Made up of anywhere from one to multiple long "leaves" of arched steel, these components would typically lie longitudinally in parallel with each other underneath the vehicle, attached to the rear axle with mounting points on the frame.
The leaf spreader comes in when it's time to remove the leaf spring. In the average case, the tool is a solid threaded rod (or a pair of them), with an extended portion that rides on the main nut, moving as the heavy-duty nut is rotated. By placing the tool between the leaf spring's shackles and expanding the rod by threading the nut, the inward tension of the spring is released from the shackles, allowing for an easier removal or maintenance process.
Some say you don't need a tool for this if you can compress the spring with a well-executed rear-axle jacking, but we can't confirm or deny if these claims are true or not for specific vehicles, and, in general, a specialty tool dedicated to your particular task is nice to have around. However, most people don't need them anymore. Some trucks still use leaf springs, but the vast majority of modern cars have switched to coil-spring, independent suspension systems that are far more compact and easier to tune and maintain, leaving the spring spreader either in the past or buried in your 80-year-old neighbor's garage.
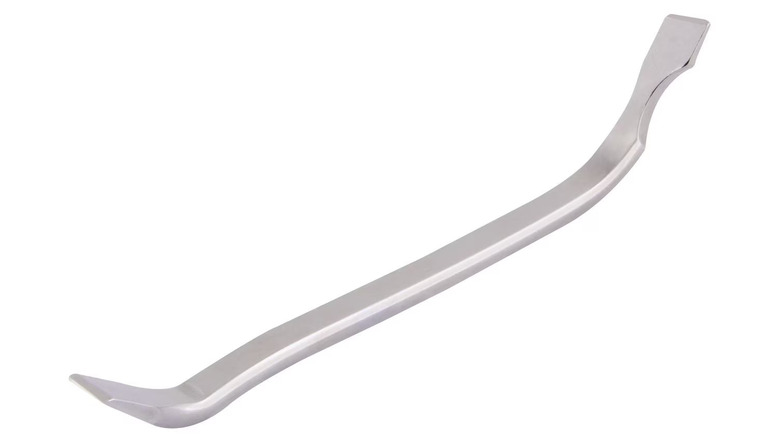
Tire spoon
Before tire-changing machines did all the work for us, mechanics would have to remove tires from wheels manually. One of the first steps in this process was breaking the bead and loosening the rubber from the wheel. It sounds about as easy as deflating the tire and prying the rubber right off, but if you care about your rims and don't want to damage them, it becomes far more tedious. In order to do this, they used a tire spoon — a pry bar of sorts that varies in length and has a spooned and rounded edge on one side. Another name for this tool is the more common "tire iron," but that definition can also describe the lug wrench under your trunk carpet, so tire spoon it is.
In the tire-changing process, a mechanic would use the tool to slowly work around the edge of the wheel, carefully breaking the bead with the spoon edge of the tool on both sides of the tire. The process also may include a second tire spoon, used to separate the bead in larger sections between the two irons.
As far as automotive purposes go, the tire spoon has certainly lost popularity over the years (the motorcycle community still uses these from time to time, and some shops still use them in conjunction with modern tire machines). As mentioned earlier, serious at-home mechanics and professional shops have access to automatic tire machines that can break beads accurately with no damage to the wheel. But the tire spoon is one of the only tools featured here that do have other practical uses. Anyone who works on older cars, or cars in general, knows a nice thick and sturdy pry bar is a must have.
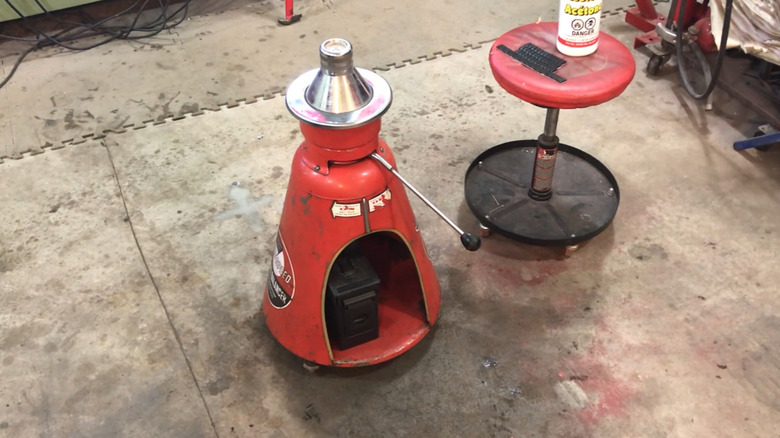
Brake shoe arc grinder
A drum brake spoon provides a means to adjust something already built into the drum brake, but a brake shoe arc grinder does work that is entirely external to the design of the typical drum brake. To optimize your brake shoes, think of them like a tire contact patch — you want your tire in the perfect pressure window so that it maximizes contact with the pavement and thus performance.
With drum brake shoes, the same idea applies. The shoes should match the curvature and contour of the drum surface they ride against. When they're misshapen, one portion of the shoes may wear more, and you end up losing maximum friction from the surface area of the shoes and drum. If you've been following along this far, you probably know what the brake arc grinder does – it's a specially made tool that accurately grinds down the brake shoe friction lining to match the drum.
You would first measure the diameter of the brake drum contact area from one end to the other, set that measurement on your grinder to the inch, and adjust a smaller dial that can adjust the machine within the inch for an accurate setting. Then you simply clamp the shoe into the machine, turn on the belt, and use what is usually a threaded handle to slowly push the shoe in by a few thousandths of an inch while swinging it back and forth via another handle. Once finished, the shoe will have a much more accurate contact patch to fit the drum.
Piston knurling tool
When a piston has seen a large number of miles, normal wear and tear begins to take its toll, eroding down the material the piston is made of and causing problems that range from excessive oil consumption to poor combustion. The knurling tool was effectively the bandage fix for this issue, as it gave mechanics a way to refresh pistons that had begun to degrade from heavy use.
The knurling tool was a machine that used a small rotating wheel with special convex prints on the outside. It was kind of like a metal stamper for leather, but on a smaller, more precise scale. Using air pressure on the outside of the piston skirt, with the inside resting on an anvil-type base, the pattern would be pressed into the piston's outer surface, forcing the metal outwards, slightly expanding the piston's size, and potentially restoring its performance.
The process was tedious at best, and it took an experienced knurler (is that a word?) to get it right. Nowadays, pistons are typically more durable and are crafted from the factory with more advanced techniques to promote longevity and resistance to wear. Honestly, even if you had an older car with a bad piston or two, it might be far easier to simply replace the piston instead of salvaging with a precarious method like knurling. As such, the knurling machine's glory days are far behind it.
Lead body filler paddles

In the days before modern body fillers with fancy polyester mixtures and fiberglass infusion, auto body repair relied heavily on metal filler. Bondo didn't even come out until 1955, and it took some time for it to catch on with the industry at large. In the meantime, folks continued using metal filler throughout the mid-century era. To be more specific, the primary material used for generic filler was the totally not dangerous or life-threatening metal known as lead.
Applying lead as a metal filler involved several steps, and wooden paddles come into play once the lead had been properly mixed with tin and heated to a temperature where the metal could be shaped. Once the lead filler was prepared, it would be carefully applied to the necessary area using wooden lead body filler paddles. One of the most challenging elements of this process wasn't necessarily the application, but the sanding. Since it was metal, though, sanding isn't quite the proper term — you would literally have to file away the excess solidified lead mixture until the proper curvature and shape were reached.
Metal body solder is still around, and you will still find metal filler used on seam welds, spaces between body panels, and other more crucial areas. However, lead filler just isn't as popular as Bondo-type products anymore for a variety of reasons, one of which is that lead fumes can be extremely hazardous. Beyond that, modern filler mixtures are simply easier to work with, and the applicating paddles used with Bondo are typically made of plastic instead of wood.
Engine crank starter

If you thought the 1950s and 1960s were tough for the average car owner, then the prewar-era drivers were living in the exclusion zone of automotive comfort. From the birth of the automobile through the 1910s, most cars had to be started by hand using a crank on the exterior of the vehicle. You knew that though — but did you know that many cars still came with an emergency hand crank for decades after?
Starting the early automobile wasn't just a crank-and-go situation, though, and in many cars, once the engine had begun running, drivers had a whole other checklist to work through. This could involve manually adjusting the engine's ignition timing, manipulating the choke on the fuel delivery system, checking vacuum pressure, and familiarizing yourself with the various levers, knobs, and buttons that often appeared in early 20th-century cars.
The manual crank starter issue was ostensibly solved all the way back in 1911, when Charles Kettering filed a patent for an electrically powered automotive starter that would allow drivers to avoid the elements and a possible hand injury when they went for a Sunday cruise in their Cadillac. Of course, this design wouldn't catch on across the entire industry for years after that, and there were still holdouts nearly a century later, as the last hand crank car held could still be bought new until 1997. Still, we're relieved that automotive starting technology has come so far.
Bubble wheel balancer
There were several methods for balancing tires before the specialized machines most shops currently use took over, but when it came to the average DIY home mechanic, the bubble balancer was the go-to option. A bubble balancer uses a base kind of like a jack stand that props up a circular tip that holds the wheel and tire up while also housing a small enclosed bubble level.
To start, the operator would have to make sure the balancer is sitting perfectly flat in relation to the ground. Some balancers came with threaded feet that could compensate for uneven ground, while others had screw-adjusted bubble housings that could do the same thing. All that mattered was that the bubble was perfectly centered in the circular case window, usually indicated by a drawn circle on the casing. Once that's done, a tire is placed on top, and the bubble will move depending on its static balance. The job is then to add wheel weights to the lighter side of the wheel — the side the bubble is moving towards — until the bubble is centered once again.
Cool, huh? The main issue with this method, and therefore the bubble balancer itself, however, is that it only measures static balance, which is the balance of a wheel when laid flat. What it's missing is the ability to read dynamic balance, which is horizontal imbalance on opposing sides of the wheel when it is upright and rotating. This limitation, coupled with the heightened demands of modern wheels and tires with higher speeds and more complex variables, required advancements that led to hyper-accurate digital wheel balancing machines, making the bubble mostly obsolete.
Points file
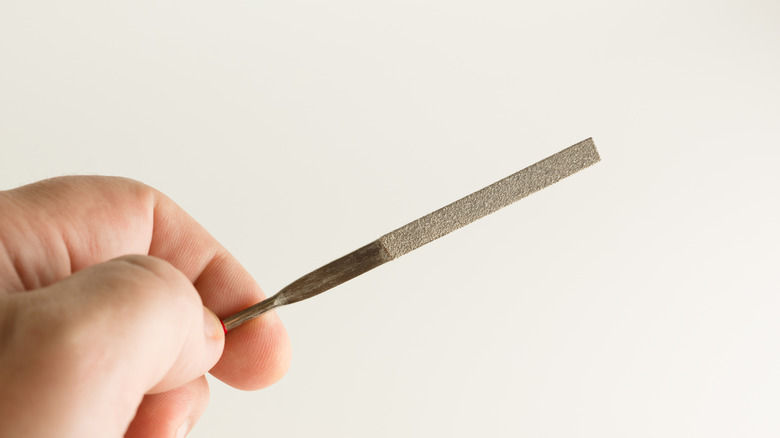
In a distributor ignition system, the contact breakers — also known as contact points — act as a switch for the coil and assist in delivering the spark to the cylinders. The two contact points open and close intermittently for extremely short (mere milliseconds) and specific periods of time. Over time, the contact points can become corroded, dirty, and pitted due to constant sparking and general wear over time.
When this happens, both ignition timing and the quality of the spark can be directly affected. In many cases, you'd want to use something to measure the dwell angle of the ignition using something like a dwell meter to figure out just how far from ideal your bad points have become. However, what many DIY mechanics have done in the past when their points are visibly messy is to use a simple tool called the points file.
While at first glance a points file might look like any old file, it is actually fairly distinct. These tools are designed to remove as little material as possible from the contact surface to avoid completely changing the distance between the two contacts and potentially cause timing issues. Other methods like sandpaper or general-purpose files can leave debris on the points, causing even more unpredictable spark and ignition issues. However, since distributors with breaker-point ignition have long been extinct from the mainstream automotive industry, points files have largely disappeared along with them.