How To Clean Fuel Injectors Yourself, And Check If They Really Need It
Fuel injectors don't just deliver fuel. They meter it, shaping the spray so the air-fuel mixture burns in the way the engine wants it to. When deposits build up, injector fuel flow can decrease and the injector's spray can change. Its angle can spray fuel farther into the cylinder than it should, and fuel droplets can end up getting larger. Without clean injectors, the engine may not get the right amount of fuel at the right moment. That's why knowing why carbon buildup happens and how to prevent it is important.
Older cars had carburetors, but modern cars use fuel injectors. There are some pros and cons regarding swapping a carburetor for fuel injection. On modern direct injection engines, that matters because the system leans heavily on spray quality. If the nozzle tip or internal passages foul, the ECU can sometimes adapt to a flow-rate change with timing control, but it can't fix a distorted spray pattern. The outcomes can include rough running, misfires, and higher emissions as the injector gets worse.
In this article, we'll be discussing how to identify injector deposit problems before pouring chemicals into a tank or pulling injectors out. We'll also walk through DIY cleaning options, explain where they can or can't help, and set clear points where cleaning becomes risky or pointless. The idea to carry forward is this: injector cleaning should be a response to evidence, not a routine action.
Know your injection type
Before you buy a cleaner or start pulling parts, identify the system and confirm what kind of fuel injection you're dealing with, because cleaning the injectors means different things on different systems. The three big types are port fuel injection (PFI), gasoline direct injection (GDI), and common rail direct injection (CRDI). While we'll focus on each type separately here, some engines have both port and direct injection.
PFI injectors spray fuel into the intake port upstream of the intake valve. It generally uses lower pressures than GDI and an environment that's less brutal on the nozzle, so light deposit issues may respond to sensible cleaning methods. It also means access is often easier, which is why many PFI cars are the most DIY-friendly when you're replacing seals or removing injectors for bench work.
GDI injectors sit in the cylinder head and spray directly into the combustion chamber at higher pressure. You may see carbon on the injector's tip, but that alone doesn't prove problematic. Manufacturers warn against mechanically or ultrasonically scrubbing GDI spray tips, because touching the tiny openings can damage the spray pattern and make performance worse.
Diesel engines often use CRDI, and that type of injection is its own world. Modern common-rail systems feed fuel from high-pressure pumps into a rail before using electronically-controlled injectors to deliver it into the combustion chamber. Because these parts run at extreme pressures and tight tolerances, diagnosis and service procedures matter more than improvisation.
How to tell if injectors are even the problem
Fuel injectors are part of the fuel system. They meter fuel in a fine mist into either the intake manifold or the combustion chamber so it can burn correctly. When injectors clog, get dirty, or fail electrically, the engine can lose that balance. If you want to catch those failures, start with the telltale signs; misfires are a big one. The engine can become shaky because the fuel mixture is not correct, or the cylinder can fail to fire because there was no fuel. Rough idling is another common issue, with the engine not remaining at consistent rpm while the accelerator pedal remains in a steady position. If you're suddenly stopping for fuel more often, a drop in gas mileage can also point to poor injectors, as a cracked injector can leak fuel.
Also watch out for hard failures. If an injector can't spray fuel into the cylinder, the car won't start because combustion can't happen. Beyond that, don't forget the not-actually-the-injector list. Problems like a weak or bad fuel pump, a failing fuel-pressure regulator, or engine leaks can mimic faulty injector symptoms. Bad fuel can also be the culprit if water or debris ends up in the tank. If multiple signs stack up, get a proper engine diagnostic that includes a fuel-system check before you start cleaning parts. Seek to fix the cause, not just the symptoms.
Big myth: Preventative injector cleaning is always needed
Injector cleaning is often sold as routine maintenance, but at least one major manufacturer says that's the wrong default. In a General Motors service bulletin from 2022, GM notes that companies market tools and programs for fuel injector cleaning as a preventative procedure, and then states it "does not endorse, support, or acknowledge a need for fuel injector cleaning as a preventative maintenance procedure." Instead, injector cleaning is something GM approves only when a diagnostic procedure indicates it's needed.
That bulletin is one data point, but the idea applies beyond GM. Don't treat injector cleaning like a scheduled fluid change unless your owner's manual says so. Most maintenance schedules don't call for periodic injector cleaning. It is usually pitched as an add-on, or it might be a rip-off rather than a required service. Don't create new problems by disturbing a fuel system that's fine.
For prevention, the easiest options are the most reliable. Run fuel with strong detergents. Top Tier gasoline is certified to meet higher detergent standards than the federal minimum, which helps keep injectors cleaner over time. And if your manufacturer's manual permits additives, an occasional pour-in cleaner can be a low-cost option. Preventing injector problems comes down to performing good maintenance, using the proper fuel, and following your vehicle's manual. However, if you're dealing with tougher symptoms, cleaning only becomes a reasonable step after professional diagnosis.
Deposit prevention that actually works

If you're trying to avoid injector cleaning in the first place, improving fuel quality is the front-end fix that actually works. Modern gasoline isn't only gasoline; it's mixed with deposit-control additives. That detergent chemistry is what keeps injectors, intake valves, and combustion chambers from building up the kind of gunk that changes how an engine runs. The Top Tier gasoline program exists because the minimum detergent level required in the U.S. can still allow deposits to accumulate over time. Top Tier standards are built around deposit-control performance. The fuel has to meet specific cleanliness targets in industry test procedures aimed at real engine parts — including fuel injectors. It proves how well-made fuels can demonstrate their efficiency in limiting deposits compared to baseline fuels.
Deposits don't just look ugly. They can reduce injector flow and spray patterns, create uneven fueling between cylinders, and wear down engine parts. That's what turns into random misfires, hesitation, rough idling, and even broken engine parts in the long run. Running a detergent-rich fuel is the easiest prevention plan. It works every time you fill up without the need for tools, disassembly, or gambling on pour-in cleaners. It won't fix a mechanical failure, but it can slow the deposit timeline enough that you might never need to do anything beyond normal maintenance.
DIY cleaning option 1: In-tank additives
While pour-in cleaners are effective for actually cleaning fouled injectors, it's still worth asking if fuel injection cleaner is worth it. It's at least easy to use, as you simply add it to the tank and let the engine run it through the system. In-tank cleaners can help as preventative fuel additives on a schedule (such as every 5,000 miles) to help handle potential bad gas or issues related to seasonal or severe weather. They're a reasonable move when you suspect poor fuel quality has contributed to deposits and you want to pair the cleaner with better fuel going forward.
However, this is a mild deposit cleaning tool, not a cure-all. It won't repair an injector that has an electrical failure, a mechanical leak, or internal damage. They also won't solve problems affecting the car's driving that are actually caused by vacuum leaks, ignition issues, compression problems, or sensor errors. If the engine is misfiring badly, throwing fuel-related codes, or running lean, don't treat a bottle as a substitute for diagnosis. Use the product exactly as directed, and don't stack chemicals. This can actually cause more problems and change desired fuel mixture. If using one doesn't change anything, that's your sign to stop pouring and start testing, because trying another bottle will just make the real problem gets worse.
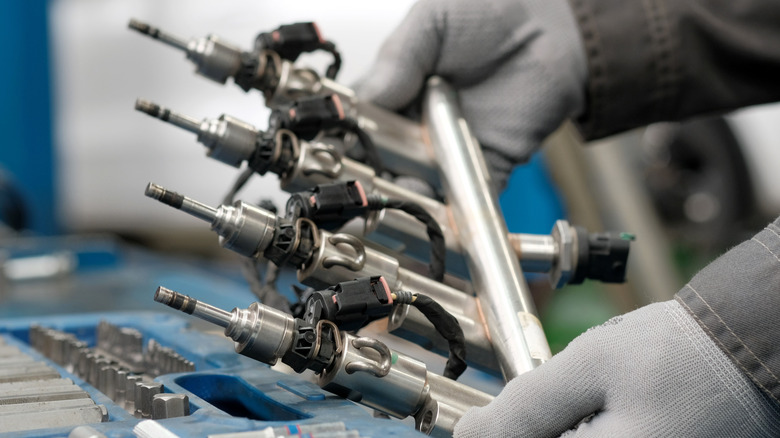
DIY cleaning option 2: Pressurized on-car rail cleaning kits
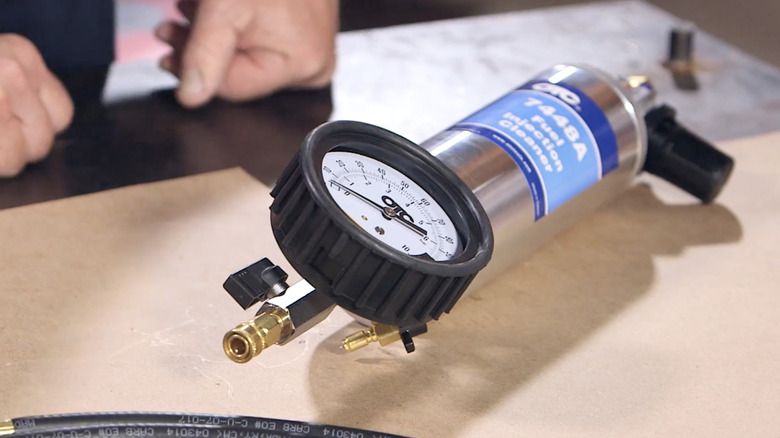
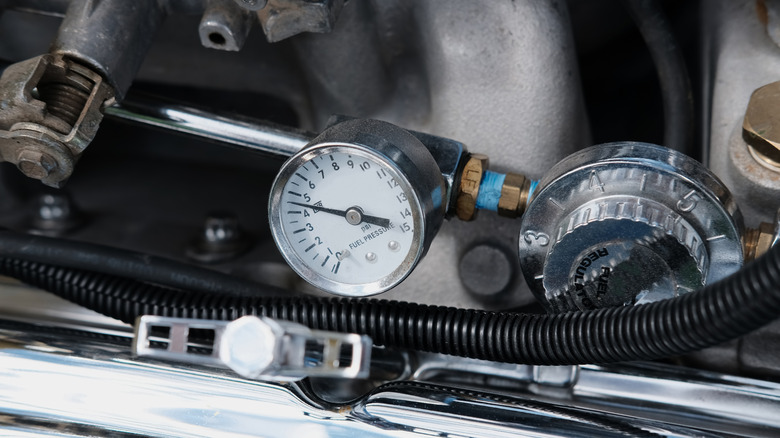
A pressurized rail-cleaning kit is the next step up from pour-in options, and it's closer to what many shops do. A concentrated cleaner is fed directly into the fuel rail or intake vacuum port so the injectors run on the cleaner rather than diluted fuel. That higher concentration can remove deposits more effectively than an in-tank product.
The reason this isn't a casual DIY method is because of safety and procedure. As an example, the instructions for these cleaners sometimes treat fuel as a fire hazard. You're working around flammable liquid, pressurized lines, and vapor. The kit workflow includes relieving fuel pressure, connecting the tool with the correct adapters, and keeping ignition sources away while you run the engine. You also need to follow the steps for disabling the vehicle's normal fuel supply so you're not just blending cleaner with gasoline and hoping it counts.
Done correctly, this method can address injector deposit issues without removing the injectors. Done sloppily, it's how you create fuel leaks, check-engine lights, or other problems. Use the exact cleaner and pressure range the procedure calls for, and watch the engine while it runs. If anything looks off, stop and reassess instead of powering through. The takeaway here is that this method can work, but the instructions are key. Treat them like a service manual instead of a casual suggestion.
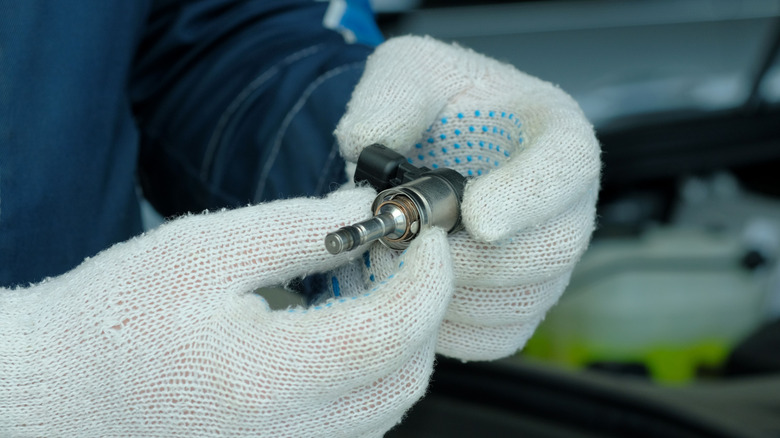
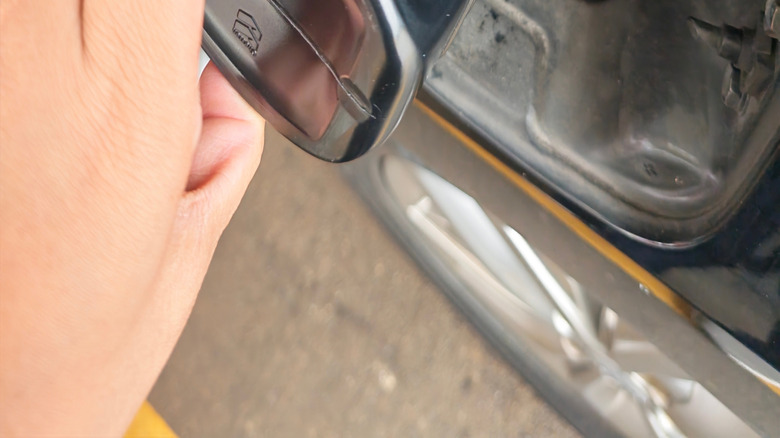
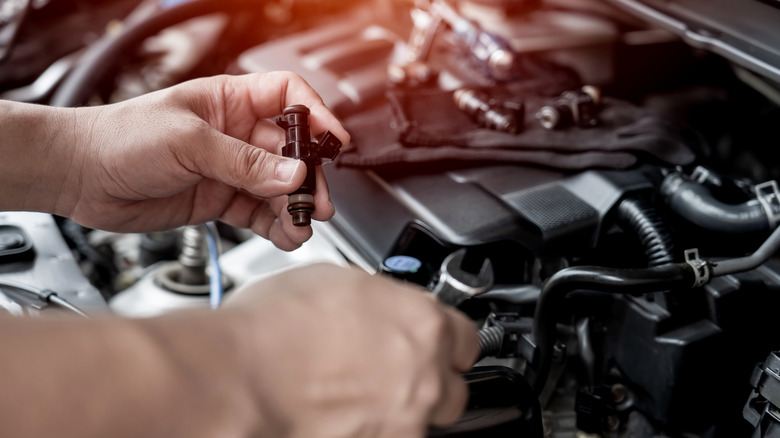
If you remove injectors, cleanliness and seals become the whole game
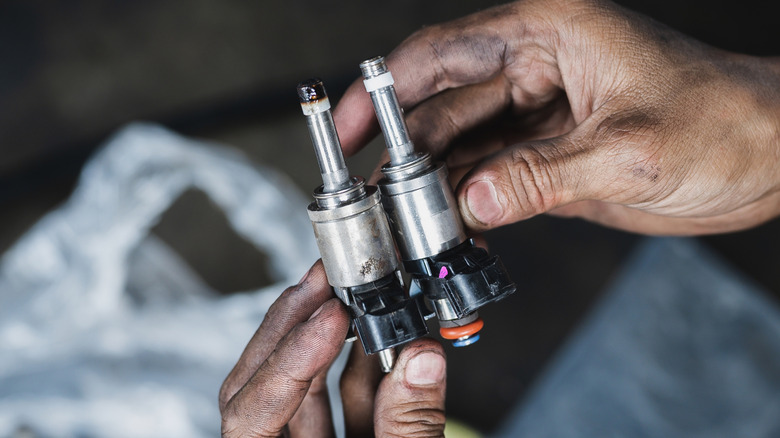
Pulling injectors is where injector cleaning stops being a quick project and starts being a precision job. Once an injector is out, the biggest risks it can face are dirt and leaks. Even a small amount of contamination can end up in the rail, the injector inlet, or the cylinder, and fuel leaks are not a situation for guess work.
Additionally, manufacturer service guidance is blunt about hardware. Seals and O-rings are not optional reuse parts. Reusing old seals can lead to high-pressure leaks, poor sealing, or injector movement that changes how it sprays. Some engines also use specific single-use components and installation steps for injector sealing, which is why service steps often include dedicated tools and a defined sequence for removing and installing the injector correctly.
The other big point is handling. Protect the injector tips and cap openings, and keep everything surgically clean. Don't lay injectors on dirty benches, and don't let grit fall into open ports just for a second. That's how a cleaning job turns into driving problems you didn't have before. If you're committed to this route, follow the vehicle-specific service procedure as closely as possible. After it's all done, prime the system and inspect every connection carefully for any leaks. In the end, the injector will be cleaner without causing leaks, misfires, or any other performance problems.
Ultrasonic cleaning: Why it works and why it's best done in a shop/lab
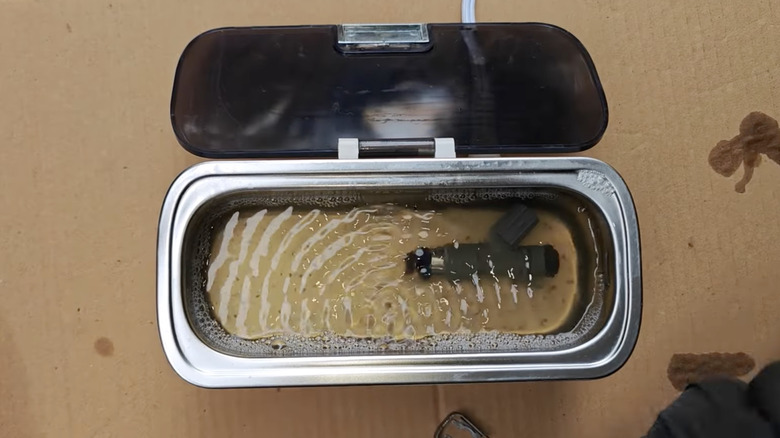
Ultrasonic cleaning can be used for injectors because it can attack deposits in the tiny passages that normal soaking may miss. High-frequency ultrasonic waves create microscopic bubbles in a cleaning solution. When those bubbles collapse, they knock contamination loose. This is usually shop work because cleaning alone isn't the point. The true test is the verification of the injector performance. In an injector-cleaning study by Meratech, injectors were cleaned for short cycles of about three to five minutes using an ultrasonic solution. The results weren't just that the injectors looked cleaner. The spray pattern changed from a weak, uneven stream into a more normal cone pattern after cleaning, which makes for an incredible improvement.
The workflow of cleaning, testing, and repeating explains why professional services are the ones for this job. Shops or labs can run multiple injectors, monitor spray quality, and decide when additional cleaning is still helping and creating an appropriate standard of procedure. If you're considering ultrasonic cleaning at home, the important takeaway is that it's not a magic bath. It's a process that only makes sense when you can evaluate the injector afterward. Without a way to check spray pattern or flow consistency, you're hoping it can work, but hope is not a diagnostic tool.
How to verify results and stop guessing
Injector cleaning only matters if it changes something you can verify. The goal isn't to simply follow the steps, but to make sure that the engine behaves differently. One of the cleanest ways to prove that is an injector balance test, which checks whether each injector contributes a similar amount of fuel. The concept is straightforward. You monitor fuel pressure, then command each injector to open for the same amount of time and watch how far fuel pressure drops for each one. If all injectors are healthy and flow similarly, the pressure drop should be consistent from cylinder to cylinder. If one injector produces a noticeably smaller drop, it suggests low flow or restriction. If one drops more than the rest, it can suggest leakage.
This kind of verification matters because it takes the guesswork out of the details. If cleaning improved balance, you can call it a win and move on. If one injector still stands out, you're no longer wondering whether you should pour more cleaner in the tank, and you're looking at replacing a specific part. When you check results, keep everything measurable. A smooth idle, cleaner starts, and fewer hiccups are great, but you won't be chasing your tail if you have a repeatable test that definitively points to what's fixed or still broken.
When replacement is actually needed
Sometimes the smartest injector cleaning decision is to not clean at all. Injector tips are precision parts, and trying to mechanically clean them can do more harm than good. Scraping, brushing, or aggressive cleaning can damage the spray holes and change their pattern, which can degrade performance. And if you also decide to ultrasonically clean it, remember that the nozzle is designed for a specific pattern. If it isn't working properly or remains an issue even after cleaning, it's time for replacement.
That's why some procedures treat certain injector-tip deposits as normal in appearance, focusing on diagnosis rather than cosmetics. On any style of injection, if the spray behavior is still compromised or no longer functioning after cleaning, there might be a crack, leak, or electrical failure that further cleaning won't solve. Replace the injector and install it the way your manufacturer specified, including any new seals and single-use hardware. Even if replacement is the only answer, that's a task that would still be best left to professionals.
Safety first: Don't make this a wild garage story!
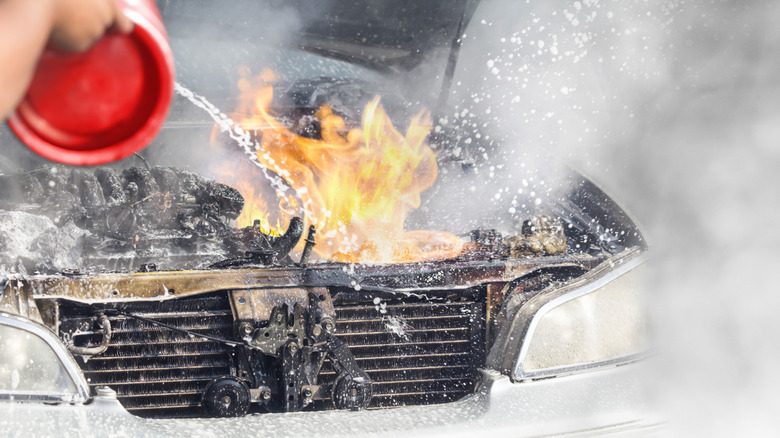
Work on a fuel system is different from swapping an air filter because you're dealing with flammable liquids and vapors. OSHA's flammable-liquids guidance is built around a simple truth: vapors ignite easily, and the worst accidents happen when people underestimate how fast a small spill turns into a fire. If you're working on injectors, keep the work area free of open flames, pilot lights, smoke, space heaters, and anything that can spark — including power tools and extension cords. Work in a well-ventilated space so vapors can't pool, and keep a fire extinguisher within reach.
Next is containment and storage. Use approved containers for flammable liquids, keep lids closed, and don't leave open pans of fuel sitting around for later. If you're draining or transferring fuel, control spills and clean them up immediately. Flammable liquid storage is about limiting the amount of fuel exposed to air and keeping it away from heat. Finally, respect pressure. Fuel systems can hold pressure even after the engine is off, and a pressurized spray is how fuel ends up on hot surfaces or in your eyes. Wear eye protection, relieve pressure the right way, and treat every disconnected line with safety. If you choose a DIY path, take things slowly and get that protection set up before doing anything. Safe work is the cheapest choice you'll ever make when sensitive systems, parts, and lives are involved.