

This YouTuber Is Building A Brand New 1967 Ford Mustang From The Ground Up
It's not every day that you see someone build a car from scratch, let alone a 1967 Mustang Fastback. But here's YouTube channel 1194video shedding light on how it can be done. Much like many other builds on YouTube, the project is still pretty much a work in progress, having started a few years back.
His videos are at least three years old at this point, and only recently has the host updated us on where things are headed. As of now, the 1967 Fastback is barebones, awaiting an engine and transmission install per the latest update. But our focus is on the 41-minute video that walks us through the entire process of building that shell from the ground up with parts mostly sourced from Dynacorn and Scott Drake via Classic Industries.
As you can see from the video, before welding everything together, he first dry-fits the panels to check alignment, then uses several clamps and sheet metal screws to temporarily keep them in place. Having another '67 Mustang — which has seen better days — as a reference really helped the host with measurements and fitment.
As explained in one of the other videos from his Mustang playlist, going his route would cost significantly less than buying a shell outright, which you most certainly can. At the time of the upload, a Fastback shell (Part number: MS67FB) cost $17,500 before crating and shipping fees, which is now $18,950, according to Dynacorn's website. But his way of individually sourcing the floor pan, side structures, quarter panels, firewall, frame rails, and so on came in significantly cheaper, at just under $11,000. However, the time and effort it takes to properly line and weld them up is quite substantial, requiring a lot of skill and patience.
So you decided to DIY the shell
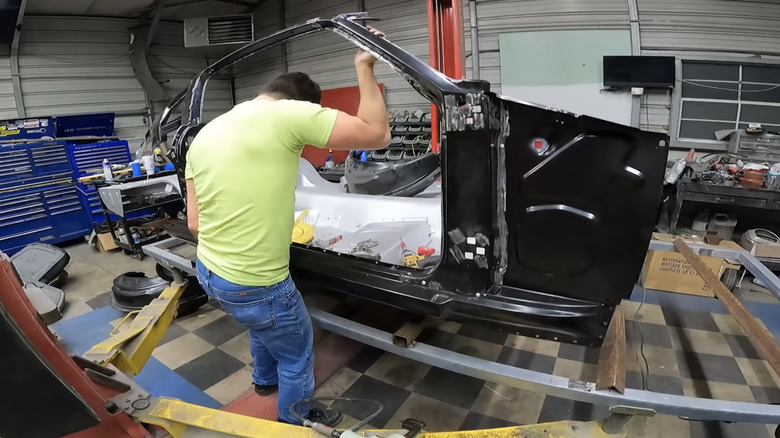
To use the sheet metal screws, you'll want to punch several holes into the parts, which our host can be seen doing with his trusty hole-punch tool. As for the chronology, it starts with bolting on the side structures to the floor pan, then introducing the inner and outer wheel houses, followed by the quarter panels, all while double, triple, and quadruple-checking the alignment. Remember, no welds yet.
The firewall goes in next, with the front roof brace screwed/clamped in later — again with a lot of measuring and aligning. Before the rear roof brace goes in, the host aligns the rear bulkhead and clamps it in. Adjust the rear roof brace after placing the roof on to see how well it sits with the side structure. At this point, you'll also want to introduce the doors and trunk lid to see how well they align with the quarter panels. Once you're satisfied with the fitment and everything lines up well, the next step is welding.
Our host completes most of the structural welds and then proceeds to install the front lower cowl and waterproofs it using a seam sealer before the upper cowl goes in. The front section is attached in a similar fashion, using screws and clamps, but before the aprons, frame rails, and shock towers are welded, they are checked for alignment. That's pretty much the shell complete, at least from the video. As you can tell, this is not a small job. Without the required skills, this could easily become a DIY horror story. If you still see this as a dream automotive project, but aren't confident in your welding skills, buy a pre-welded body shell and go from there.