How To Clean A Carburetor, With Or Without Removing It
Cleaning a carburetor is an important step in preventative maintenance on cars, trucks, motorcycles, and small engines. The procedure can often be done when the carburetor is still on the engine, but when the carb is particularly dirty or in need of other repairs, it might be more sensible to remove the carb from the engine.
The process of cleaning a carburetor is safe when performed correctly, but you will need to take steps to prevent damage or the possibility of a serious fire. When cleaning a carb, you will need to use the correct products and the right tools. Some cleaning agents can be harmful to delicate carburetor parts, while scrubbing pads and other cleaning aids can cause further damage that can destroy a carb.
In many cases, it might not be clear when it is time to clean a carb without understanding the symptoms of a dirty carb. In this article, we will break down the various symptoms associated with dirty carbs, the steps necessary to properly clean them, and how to avoid causing damage. We will also explain some of the different types of carbs and why cleaning them can provide better performance.
In some cases, cleaning the carb won't resolve the problem and the carb will need to be rebuilt. We will explain when this is necessary and how to identify signs that a carb needs more advanced service. If you decide to rebuild your carburetor, Jalopnik has a guide to help walk you through the process of rebuilding a carburetor.
Symptoms of a dirty carburetor
Most symptoms of a dirty carburetor involve poor idle quality, a lack of performance, and reduced fuel economy. You may also experience intermittent problems such as sticky components that can lead to dangerous situations. Symptoms can range from minor inconveniences to complete failure. Starting with the most benign symptom, we will walk through how various problems can be caused by dirt and gunk build up in the carburetor.
The most minor symptom is cosmetic. This can include dirt, grease, fuel, and other debris accumulating on the external surfaces of the carb. While this doesn't typically cause any performance problems, the build up can become excessive, leading to sticking cables and levers that can lead to more severe problems. Excessive build up can also cause damage to the body of the carb which can lead to other significant problems.
The most common symptom of a dirty carburetor is poor idle quality. You will notice the RPMs surging or stumbling. Most often, this unstable idle will extend into the performance band, often with stumbling acceleration and poor fuel economy. More severe contamination can result in a no-run condition in which the engine will not start or will die under acceleration. This is a potentially dangerous situation because the engine may die while driving, presenting a hazard to the driver and others on the road. Routine maintenance can help to prevent this from happening.
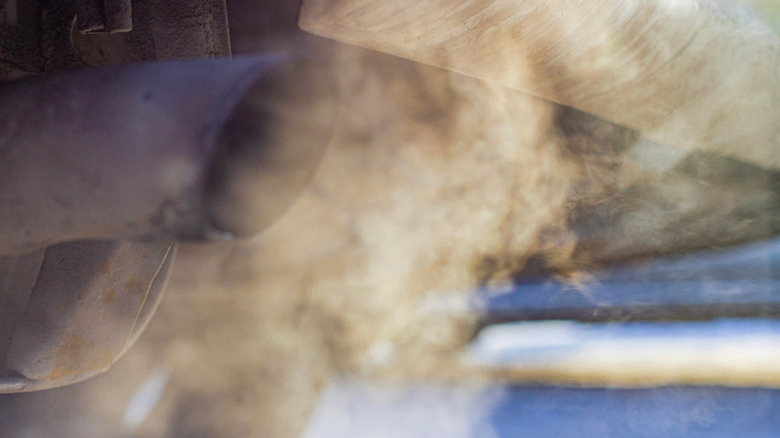
Another symptom of a dirty carb is failed smog inspections. A dirty carb can create dangerous levels of pollutants that can impact whether a vehicle can be registered. While laws vary in different states, the California Bureau of Automotive Repair provides a good example of the requirements for passing examinations.
Determining whether a dirty carb is the cause of problems

In many cases, other problems can seem like a dirty carb issue, but may be more severe or associated with a different problem. Understanding some of the other problems that are often blamed on carb problems can help to narrow down when other repairs are needed. This is particularly important when dealing with older vehicles when carbs were common.
A dirty air filter can cause many problems similar to the symptoms of a dirty carburetor. A dirty air filter can cause reduced performance, poor fuel economy, and idle issues. This is because air entering the engine is obstructed by the dirty filter which causes the engine to run poorly. Since idle issues are often the most common symptom of a dirty carb, other issues that can cause these problems need to be ruled out. Incorrect timing, for instance, can lead to similar symptoms such as poor idle, lack of performance, and poor fuel economy. If you suspect this might be the case, a timing light can be a useful tool to help check if your engine's timing is accurate.
Electrical issues can also create similar symptoms to a dirty carb. For example, carburetors using an electric choke might not operate correctly if there is damage to the wiring. Some engines use a variety of electrical actuators and other devices to ensure proper running conditions. When these systems are compromised, the symptoms can be similar to a dirty carb.
Types of carburetors and cleaning tips
Carburetors may seem like complicated components, but at their heart, they are actually quite simple. The purpose of a carb is to mix fuel and air at a specific ratio that allows ideal combustion based on the size and type of engine. We are going to discuss some of the common types of carbs to help you understand how to properly clean each type.
The most basic carbs are those used on small engines like lawn mowers, weed whackers, and other garden equipment. Some of these are simply gravity-fed, meaning there is no fuel pump. These use very basic controls such as a choke, which is essentially a plate that restricts the amount of air entering the carb. The combustion process draws in air, which is regulated, to be mixed with fuel.
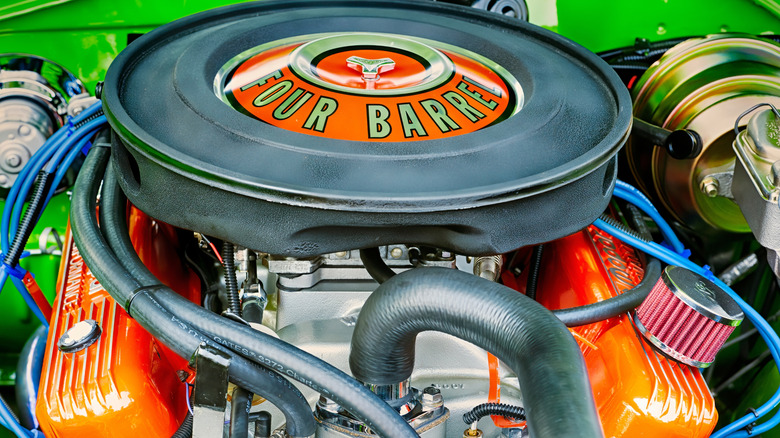
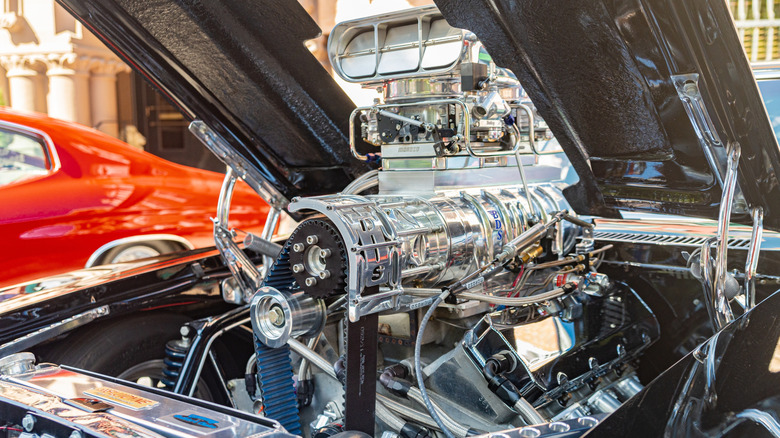
Automobiles and motorcycles use carburetors ranging from single-barrel designs to four-barrel and multiple-carb setups to further increase power. While a larger carb can help increase power, a carb that is too big, as measured in cubic feet per minute of airflow, can only improve power when other modifications are made to improve airflow.
What you should not do when cleaning a carburetor
The biggest mistake people make when cleaning a carb is using the wrong products to clean it. Things not to use include steel wool, abrasive cleaners, and scraping tools that can gouge flange mating surfaces. The trick is to take your time, let the products work, and be as gentle as possible. The most common contaminant on the outside of the carb is oil, grease, and grime from road surface and the engine. Cleaning these with a simple carb cleaner is the best option. A nylon brush is helpful to loosen stuck-on bits.
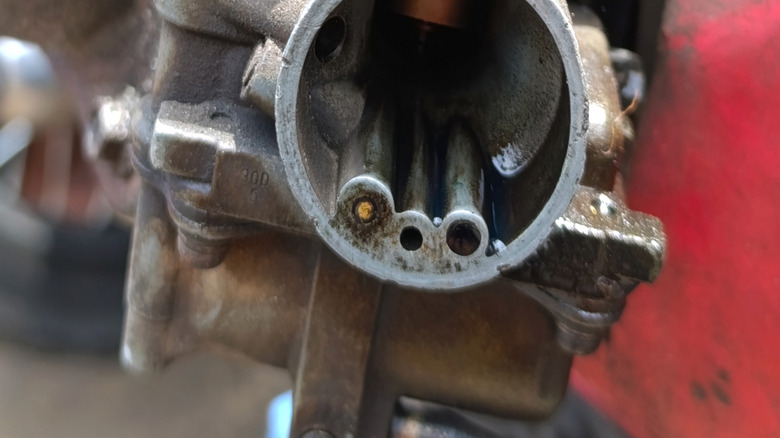
It is not uncommon for carburetors to build up varnish, which is unburnt fuel that solidifies. This appears as a yellowish or brown coating that is often sticky. It can be tempting to scrub this with steel wool or other abrasive products to quickly remove the varnish, but this process can also lead to scratches and irregularities that can cause permanent damage to the carb.
Avoid using sandpaper to clean a carb. It can be tempting to use a super fine grit wet or dry sandpaper to clean the carb, but this can cause long-term and irreparable damage that will make the carb unfunctional or damaged beyond repair. A rag, soaked in carb cleaner, is slower, but safer for removing gunk from your carb.
Only use products intended for carburetor cleaning. Many household cleaners can be effective, but the end results can be unpredictable. Anytime water is used to rinse a component, make sure it is fully dry before reinstalling it. Water is one of the most damaging things for carbs. It is fine to use dish soap to clean aluminum carburetor bases for example, but the parts must be completely dry before reinstalling to prevent contamination.
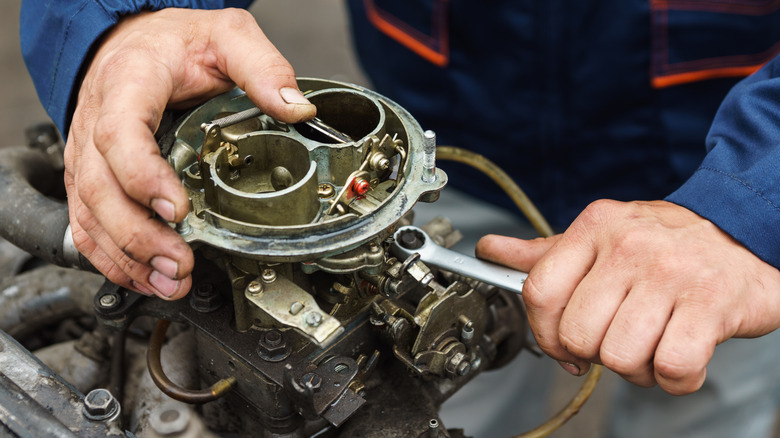
Cleaning a carburetor on the engine
Minor problems such as a slight stumble at idle or hesitation on acceleration can typically be addressed by cleaning the carburetor while it is still on the engine. This might involve cleaning linkages, choke plates, throttle plates, and other associated parts while the carb is still mounted to the engine.
Most often, small carbs on lawn equipment won't require removal and can be cleaned in place. These simple carbs typically only require removal when being rebuilt or replaced. A simple cleaning can typically prevent problems, but this should be done frequently, particularly on lawn equipment that is exposed to significant dirt and dust.
Automotive carbs can generally be cleaned on the vehicle preventatively to ensure proper performance. Again, ensuring a clean air filter is essential. Many problems with dirty carbs can be traced back to a failure to replace the air filter since it is the first line of defense to keep particulates out of the carb.
Proper tools for cleaning a carburetor on the engine
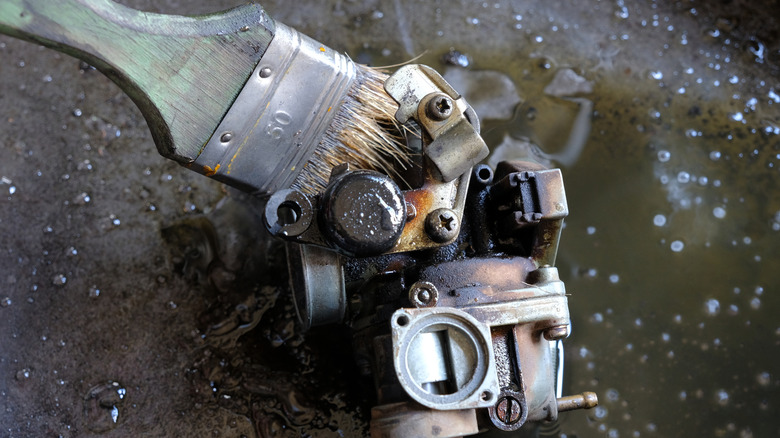
We like to use small nylon brushes when cleaning a carb on the engine. This involves spraying the dirty area, scrubbing lightly, then respraying to remove residual grime. This procedure is often performed on linkages, springs, and exterior surfaces to prevent buildup of grime and gunk. It can also be a great way to identify other, underlying problems such as fuel leaks.
After removing the air filter, carb cleaner can be used to remove gunk from the air horn and upper areas of the carb. Use a shop towel to gently wipe down areas after spraying with carb cleaner to remove mild buildup. Open the choke plate manually and clean both top and bottom surfaces, then do the best you can with the throttle plates. These can be difficult to access without removing the air horn from the carb, but regular preventative cleaning will help reduce the need to take the carb apart to clean it.
For excessive buildup, brass brushes are generally safe for cleaning aluminum, but avoid using too much force. Avoid using steel brushes as they can easily harm the finish of the carburetor that can lead to other problems, such as corrosion. Many carburetor linkages use a preventative coating that can easily be damaged when using chemicals and brushes.
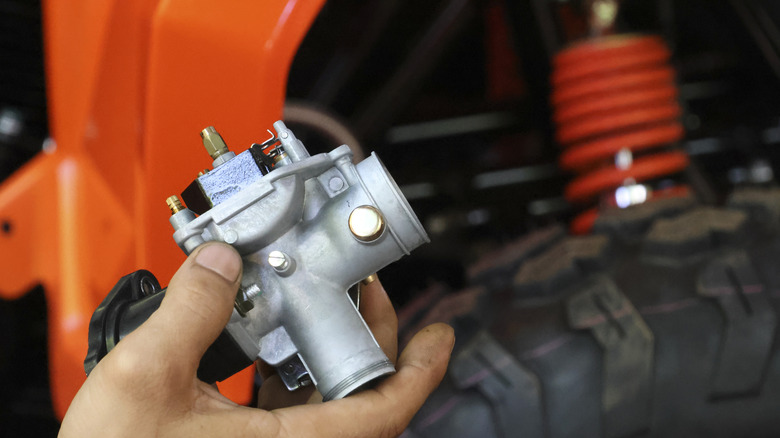
When to remove the carb for cleaning
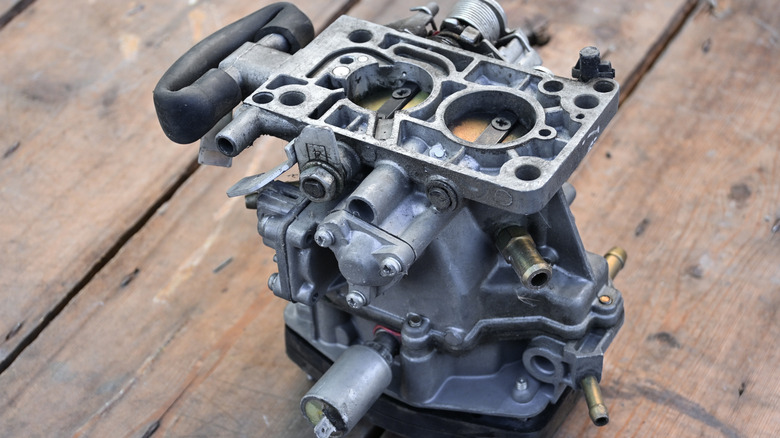
In some cases, it is necessary to remove the carburetor and disassemble it to properly clean everything. This is often the case when excessive accumulation of grime has caused blockages in air passages or when other aspects of the carb are failing, for example, gaskets that can allow leakage of fuel or air. Vacuum leaks can cause lean running conditions that lead to increased operating temperatures, poor performance, and excessive fuel consumption.
The most common reason to remove a carb for cleaning is when other components are in need of service. This can include internal fuel filters, fuel floats, and blockages of air screw passages. Most carbs have one or two air fuel mixture screws that allow the operator to tailor the amount of fuel flowing into the carb. With carbs like those made by Holley or Carter/Edelbrock, these air fuel screws are accessible with the carb mounted, but properly cleaning the passages might require the body of the carb to be disassembled to properly clean.
A long service life, lack of preventative maintenance, and hard use can lead to gasket failures at the fuel bowls and between the air horn and the body of the carb. This can lead to air leaks that can also increase the likelihood of contamination leading to performance issues. In most cases, replacing these parts requires the removal of the carb from the engine.
Steps to make off-engine cleaning a success
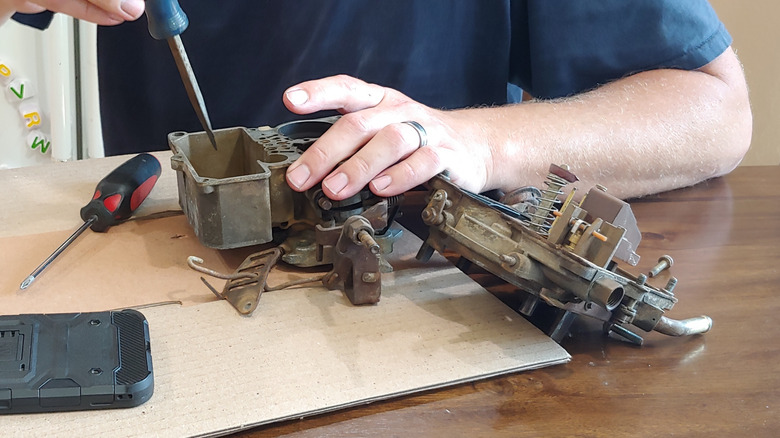
Before removing the carb, make sure to take good notes and photographs of the linkages so that you will have a guide to put the carburetor back together the way it was when it was removed. Nothing is worse than going through all the work to clean a carb just to forget how it goes back together.
With the carb removed, you will want to make sure the throttle plates are clean, the throttle shaft is clear and straight, and the carb flange is level. You can check this with a ruler by sliding the ruler across the flange from multiple directions. Any deviation is a cause for concern and you should contact a machine shop to ensure the proper flange straightness is achieved. Flanges can be bent due to excessive heat, improper torque, and damage from using the wrong tools to clean the flange.
Many types of carburetors have small parts that can easily be lost when disassembling for cleaning. It is important to use a large, clean workspace and to organize small parts in plastic bags or an egg crate to prevent losing them.
Final Thoughts on Cleaning a Carburetor On- or Off-The Engine
How often you drive and what conditions the carb experiences during operation largely dictate how often it needs to be cleaned. We have seen street-driven vehicles with over 20 years of operation that required only a brief clean-up to get the carb looking great, but we have also seen dirt bikes and lawn mowers that need to have a carb clean done monthly, if not sooner. It all depends on the conditions, the maintenance, and the value you put in having this critical component function at its utmost.
Most street cars running standard quality pump gas and being used for day trips, car shows, and such won't require a carb cleaning beyond ensuring cosmetic appearance more than once a year. Even high-performance engines tend to not need frequent cleaning, provided the air filter is kept clean.
Dirt bikes, off-road vehicles, and most lawn care equipment, however, will need more frequent service to ensure proper operation. This is due to exposure to harsh conditions, dirt, and grass. Regularly cleaning the carb on the engine will prevent some of the most drastic problems while a complete tear down and cleaning might be necessary every year or two.