Want To Turn A Shipping Container Into A Garage? Here's What You Need To Know First

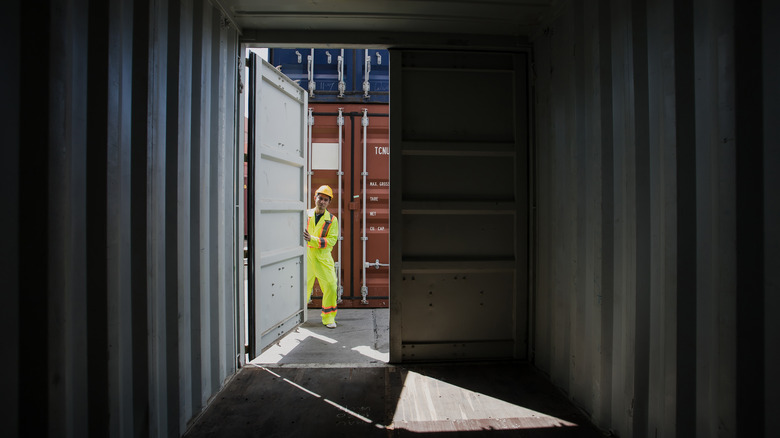
A shipping container garage can be quick to set up, relatively affordable, and seriously tough. At its simplest, it's a steel box that gives you a dry, lockable place to park a vehicle or tackle projects, and it can be relocatable if you ever move. Availability stemming from a global surplus of shipping containers and easy transport are two reasons why containers work so well for storage and as building blocks for larger projects. They can even be used to build out as a camper.
Turning one into a true drive-in garage, the kind you use daily, is different from parking something inside and closing the doors. A single container is narrow enough that a car fits, yet you may not have comfortable room to open doors or work around it. Even high-cube units still cap ceiling height, which matters if you want extra overhead clearance or that "real garage" feel.
Many successful builds start with a reality check. You need to plan what you'll do inside, what access you need, and what it takes to keep a container dry, stable, and comfortable for years. The difference between a storage container and a garage is the planning that happens before the first purchase or cut.
Define the use case
A shipping container can be a secure place to park a vehicle, but first decide whether you're storing something or building a space you'll work in. For seasonal storage, the priorities are simple. It's best to keep weather off the vehicle, keep it out of sight, and keep pests from moving in. A steel container is built for harsh conditions, and it can be cost-effective if you buy one and avoid recurring storage fees.
However, a functional garage is a different job. Most containers are about 8 feet wide, which can make daily access and maneuvering tight. If you plan to do repairs inside, that narrow footprint limits door swing, tool access, and how comfortably you can move around. That's where a traditional garage often wins. Single-car garages are commonly around 12 feet wide, giving you space on both sides. A container build with multiple containers or modifications to a single unit can accommodate needed factors with a solid plan.
To improve container functionality, assume you'll modify it. Plan for extra doors, lighting, power, plumbing, ventilation, and moisture control so condensation doesn't become mold or rust. Choose a container for storage when you want security and protection, or choose it as a garage if you're ready to build it out for real use.
Choose the right container

Buy the wrong box and you'll spend the rest of the project fixing that decision. Start with the math. Standard containers are 8 feet wide, most are 20 feet or 40 feet long, and high cube versions add extra interior height. Measure your vehicle's length, width, and height, then compare that to the container's interior dimensions, and leave margin to steer in and out without grinding mirrors on walls.
Condition matters as much as size. Before you pay, inspect for holes, corrosion, and signs the frame is not square. A container can look fine from a distance and still have a twisted corner that makes the doors a constant fight. If available, a newer one-trip container — a container that only made a single shipping journey — means fewer dents, cleaner floors, and less time chasing leaks. Make sure the doors swing smoothly and the gaskets seal, because a garage that isn't watertight becomes a moisture trap fast.
For long-term car storage, a good container can prioritize ventilation and solid weatherproofing so humidity stays manageable. Think about the floor, too, and add a protective layer so moisture doesn't sit under tires. Finally, treat security as part of the container choice. A lockbox or upgraded hardware, or even a remodel with new lockable doors and windows is easier than dealing with theft after the fact.
Permits and zoning
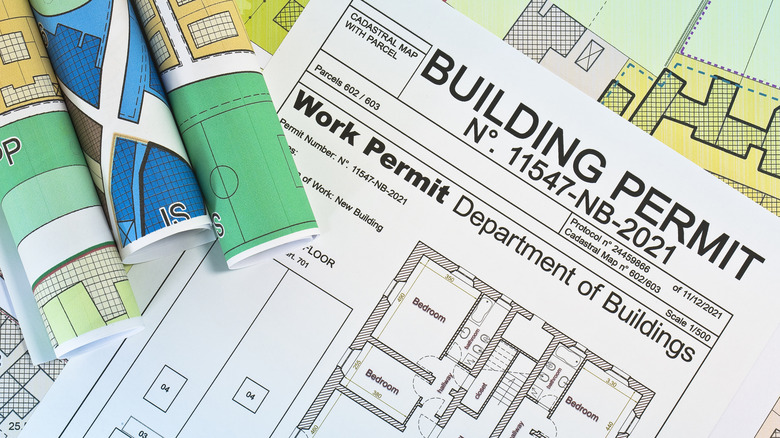
Once you've decided you want a garage instead of a storage box, a container stops being a casual drop-and-go addition to your property and needs to start looking like a structure. Zoning may dictate whether a container is allowed, where it can sit, and whether it counts as an accessory building or temporary storage. Building departments may also care whether it's occupied, detached, and whether you're adding electrical, mechanical, or plumbing.
The key idea is that codes can allow alternative materials, design, and construction methods, but only with official approval. In plain English, a container garage can be acceptable if you show it meets the intent of the code and isn't less than a conventional structure in quality, strength, effectiveness, fire resistance, durability, and safety. That's why the fact that it was once used as a shipping container doesn't automatically simplify anything – once you cut in a roll-up door or start building it out, you're asking the officials to treat your steel box like a real building.
Go in prepared with a clear site plan, a foundation or anchoring concept, and drawings showing how openings will be reinforced. Expect requests for engineering or documentation to support equivalency. If it's denied, the officials typically will explain why in writing. Use that feedback to revise the plan and seek to move forward.
Foundation and drainage
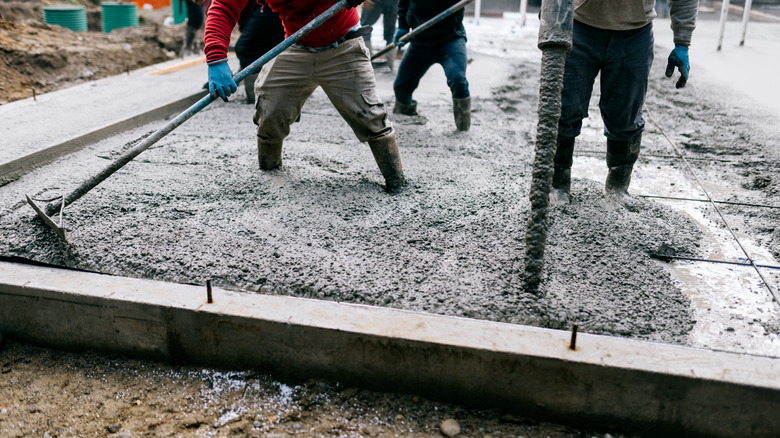
A container's foundation is where cheap builds either stay cheap or get expensive. You're not just propping up a steel box, you're choosing a base that supports the load, stays level, and survives local weather without settling, shifting, or trapping water. For a long-term garage setup, a concrete slab is the simplest option, since a slab provides one flat surface that spreads weight evenly and makes later upgrades easier.
If a full slab isn't possible, you still need stability and drainage. Concrete piers can support key load points, especially corners, while using less material. A gravel pad is popular because it lets water move through instead of pooling, but only if it's properly built and compacted. Many people pair landscape fabric with crushed stone to keep the pad from migrating and to help it drain. Helical piers, which are screw shaped poles that secure themselves into tough soils, can transfer load to deeper, more stable ground. Other approaches, such as blocks, can work too, but the same rules apply — you need solid support and drainage.
Drainage matters as much as what the container sits on. Have a professional read the site, soil and runoff paths, then grade and level so water doesn't collect around the footprint. Keeping the underside dry will protects everything you'll do next.
Anchoring
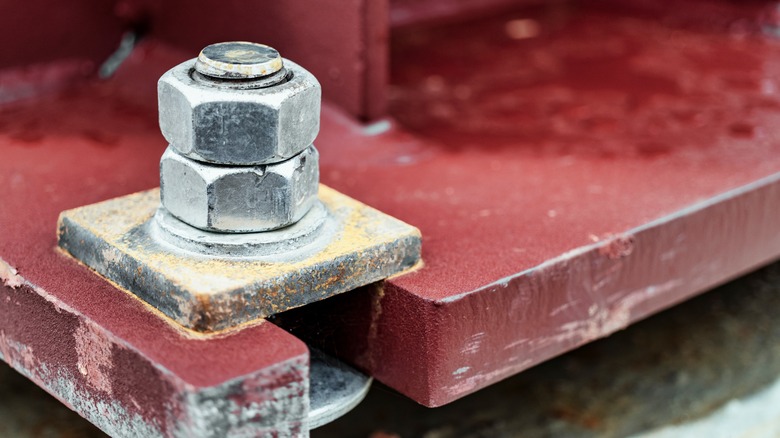
A container can feel immovable, but heavy isn't the same as secure. If the site is uneven or the base is weak, the box can shift, sink, or lean, which is when doors stop lining up and water finds its ways in. Before major modifications, prep the site like a permanent structure. Clear the area, get it truly level, and compact the soil so weight is supported evenly.
From there, the corners are the load paths that matter most. A common approach is concrete piers. Support all four corners and add mid-span piers so the container doesn't sag. On softer ground, deeper pile foundations can provide better footing, while a slab-on-grade gives you a full, flat base that resists movement and makes the container easier to live with long-term.
Don't treat anchoring as separate from drainage. When anchoring your container, grade the ground so water runs away instead of pooling against steel. For long-term placement, durable supports, either concrete or steel, and airflow under the container help prevent trapped moisture. Stabilize the base, especially the corners, and you'll avoid the sliding, tilting, and water problems that turn a budget build into a headache.
Cutting openings for doors and windows
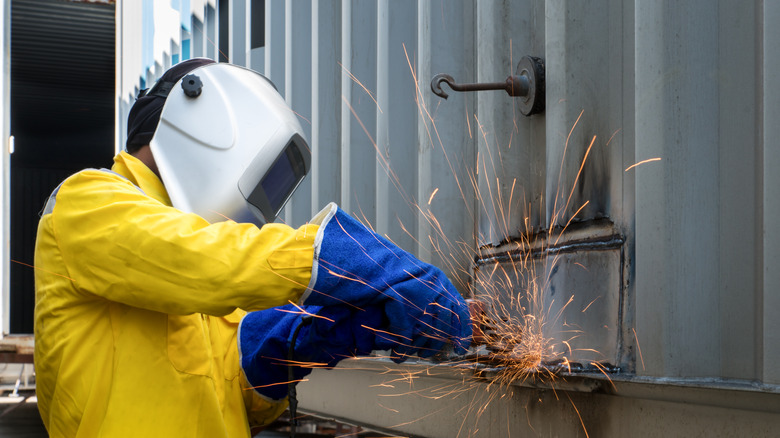
The moment you cut an opening into a container, you're no longer dealing with a simple steel box. You're now modifying a structural shell. The corrugated walls and roof of a shipping container don't just keep the elements out — they resist racking and flex when the container is moved, set down, or pushed by wind. Remove a big section of a wall and you lose stiffness unless you replace it with reinforcement.
Plan on framing the opening like a picture window. You'll need stout vertical posts at the sides, a beefy header, and tie-ins back to the corner posts so loads have somewhere to go. If you want a wide, garage-style door, pay extra attention to bracing and alignment, because a container that twists can make the door bind and seals stop sealing. Even a smaller door benefits from strong framing, especially if it's cut into the middle of a panel, not near a corner.
Don't leave cut edges for later. Every fresh cut is bare steel, and that is where rust starts. Deburr, prep, then seal with proper primer and coating so corrosion doesn't creep under paint. This step is often the difference between a long-lasting garage and a flaky, rusty project.
Rust and water

Containers are built for ugly weather, which is why they're appealing for vehicle storage. They're designed to be weather and corrosion resistant and can shield a vehicle from harsh conditions. Keep in mind, however, that resistant doesn't mean immune. Steel still rusts when water sits where it shouldn't, and corrosion loves seams, scratches, and any cut edge you didn't seal.
Start by controlling where water goes. Set the container on level ground or, better, on a foundation, and make sure the surrounding grade encourages runoff instead of puddles against sidewalls. Watch the roof, as well. You want water shedding off and away, not pooling into a slow-motion rust experiment.
Then treat the exterior as something you maintain. Even A-grade boxes can have dents, scratches, and surface rust, so coatings and touch-ups matter, especially if you live near salt air or in humid climates. Walk the container a few times a year and look for bubbling paint, orange streaks, or damp spots that hint at leaks. With basic upkeep, containers can last for years — maybe even decades.
If this is a long-term garage, keep it dry inside with ventilation, insulation, and temperature control that help manage humidity so condensation doesn't become internal rust. Do the work early and your container garage will hold up well. Don't let this become your worst experience with rust.
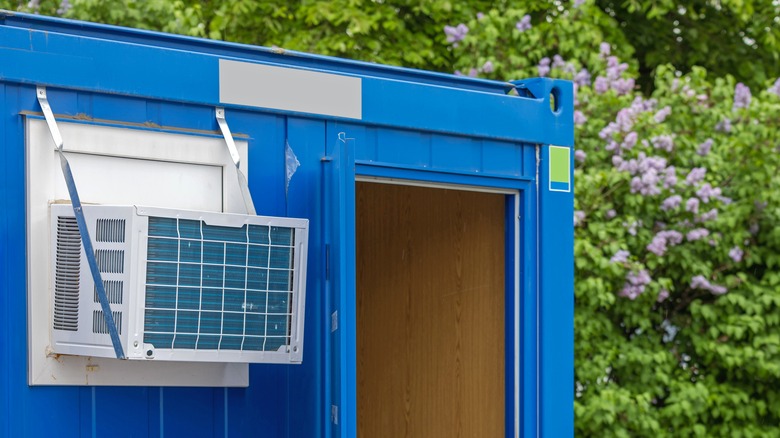
Ventilation plus humidity control

Containers are built to protect cargo, not to manage moisture from a car that just drove in through rain or snow. Without airflow, condensation can build up inside a steel box, especially when temperature swings cool the walls and ceiling. That trapped moisture leads to mold and mildew, and it can accelerate rust on tools, shelving, and the vehicle itself during long-term storage.
If you're building a garage you'll actually use, ventilation and humidity control aren't just nice to have, they're basic preservation. Plan airflow that moves damp air out with vents, a fan plan, and, depending on climate, a dehumidifier or moisture absorbers to keep the interior stable. Even containers with small built-in vents may not be enough once you park a warm vehicle inside and shut the doors.
Treat fumes as a life-safety issue. Garages collect vapors, and enclosed steel spaces can trap them. Don't idle vehicles in a sealed container, and don't assume because it's just for storage that means you can ignore air quality. Fuel vapors and odors can linger longer than you expect in a tight steel shell. Keep the air moving, keep the moisture down, and your container garage will stay cleaner, safer, and far less rusty.
Insulation and thermal bridging

Steel is an enthusiastic heat conductor, which is why a bare container can become very hot in the summer and very cold in the winter. Insulation turns a container into a usable garage by slowing heat transfer and smoothing temperature swings. It also helps with moisture. When temperatures fluctuate, condensation forms, and that moisture feeds mold and corrosion.
The catch is that insulation isn't just an added material to the walls. It should be specifically chosen for the space. You're fighting thermal bridging anywhere steel connects inside to outside, so a little insulation doesn't guarantee comfort. Spray foam is popular because it expands to seal gaps and can create a continuous air/moisture barrier with high insulation value. Rigid foam panels can also work well when you want something durable and straightforward to install, especially if you prioritize moisture-resistance.
Whatever route you take, plan for the tradeoff. Every layer eats into width, so consider wall build-out, storage, and vehicle clearance together. Insulation works best when it's installed cleanly, sealed well, and paired with ventilation so trapped moisture doesn't become the slow leak that ruins the container from the inside out.
Electrical

A container can feel like a cave as soon as the doors close, so lighting and electricity are essential to transform it from a steel box into usable space. Good lighting improves visibility for organizing and working, and it reduces accidents by eliminating dark corners. Power matters for safety, too, because built-in outlets beat running the whole garage off extension cords just to charge a tool or run a fan.
With reliable power, the container isn't limited to daylight hours. You can treat it like a workshop. You can plug in chargers, run power tools, and set up a productive space without juggling cords. Electricity also enables comfort upgrades, since ventilation fans, dehumidifiers, heaters, and A/C all depend on power.
Plan the layout like a working garage. Put light where you'll do work, and place outlets where you'll actually stand, not just where wiring is easiest. A basic setup can include adding lights, a switch, and a few outlets to the container from an existing utility panel on the property. A more robust build may add circuit protection and a distribution panel dedicated to the container for larger loads. The more shop-like your electrical plan is, the more often you'll use the container like a real garage.
Heating/cooling plus fire and fume safety
Heating or cooling a container garage is doable, but treat it like a garage, because the risks are the same. The potential threats are fire, fumes, and stored fuel, solvents, and vehicles. If the container is near a home, separation comes first. The wall and ceiling assemblies between the garage and living space are typically expected to use fire-resistant finishes, and the connecting door can't be a hollow interior door. It should be a proper fire-rated passage door, and it only works if it stays shut, so self-closing and self-latching details matter.
Fumes are the other half of the problem. Carbon monoxide protection matters most when a garage communicates with the dwelling, because you're most vulnerable when you're asleep. Air-sealing between the garage and the home is as important as fire rating, since garages hold pollutants even when nothing is running. Whether attached to the home or not, the garage needs proper ventilation for any potential fumes.
Heating equipment has its own expectations. Ignition sources and fuel-fired appliances in a garage are generally positioned to reduce the chance of igniting flammable vapors, and anything that could be hit by a vehicle should be protected. Also, don't assume you can tie the container into the house HVAC. Garages aren't automatically treated like conditioned living space, and shared systems can quickly create safety and code headaches.
Flooring
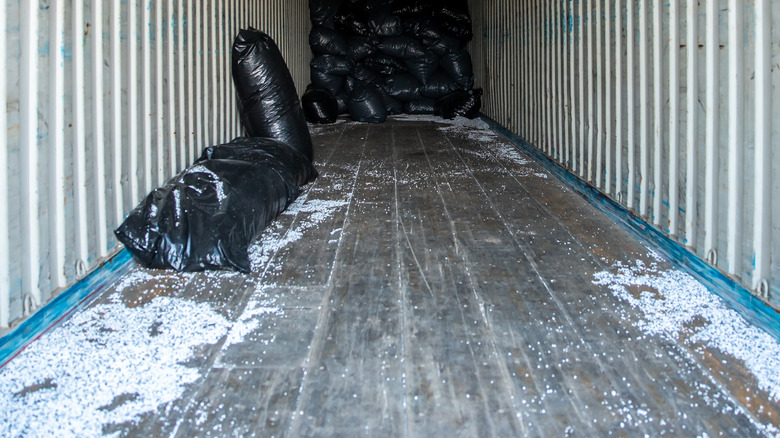
Most containers don't have a steel floor. They typically use marine-grade plywood built for heavy loads and rough weather, often with coatings and chemical treatments to fight moisture, mold, and pests. That's great for ocean freight, but it matters if you'll spend time inside the container as a garage.
Start with an inspection. Check for soft spots, warping, rot, dents, or punctures from forklifts and pallets. If there's a strong chemical odor, mystery staining, or unknown history, don't ignore it. Treated plywood can be a concern in enclosed spaces, and once you add insulation and wall panels, lingering odor or off-gassing becomes your problem every time you close the doors.
The fix is straightforward — you can seal and overcoat the existing floor to reduce exposure, or replace the plywood for the cleanest reset. Then choose a finish that matches your use. Epoxy is worth the effort and easy to clean. Vinyl plank adds comfort and a finished feel. Also, a raised subfloor can help with insulation, leveling, and moisture control. Do floor work early, before you build anything on top of it, to prevent long-term headaches.
Build sequence and budget concerns

Most budget blowups are late surprises such as site work, drainage, anchoring, door reinforcement, electrical runs, insulation, and moisture control, as we have discussed. If you buy the box first and "figure it out later," you often pay more. You'll pay once for the quick install, and then again to undo it when problems arise, or you can't accomplish certain details, such as routing power where you need it.
A good project sequence for any construction job starts before delivery. Lock in your use-case and layout, then choose a container that fits the plan. Next is site prep. Clear the land and level the area, confirm access for delivery equipment, and build a foundation plan that supports corners and moves water away. This is also when you account for soil conditions and local wind or seismic realities, because they affect anchoring and long-term stability.
After the container is level and secure you can do the irreversible work such as structural cuts for doors and windows, followed immediately by reinforcement and corrosion protection on cut edges. Then it is time to run utilities. You can install the electrical, plumbing, and ventilation while walls are accessible. Finish with comfort layers such as insulation, interior finishes, and any HVAC needs. Follow that order and you avoid the trap of a cheap container that becomes expensive because the plan wasn't in order. Doing this well could turn into your ideal one-car garage.